Thursday, 7 May 2015

Personalised Photo frame

Gifts are always loved to both receive and give, I love to receive gifts ;) It strengthens the emotional bond between people and stays as a precious happy memory with us... It is the best way to express our feelings.

Personalised gifts adds the magical spark to any moment. It makes your special person feels very very special. I love to make personalised gifts for my loved ones.

I created a personalised photo frame for someone very special in my life. As pictures/photos have always been the best way to save memories for forever.

So lets get started,

Step 1: To get a plain wooden photo frame, I got mine from Micheals(my fav. craft store).. My frame has come with a hole and stick to make the frame stand perfectly....


Step 2: For base coat, Paint your frame with white colour(optional), I would prefer you to give your frame a white base coat so that your main colour would come very brightly on white.


Step 3: To make my frame more expressive, I decided to draft all relationships we share. So draft all text and other details you want on your frame. Make sure you use some light shade colour on top of your text to make your text visible to you after painting on it.


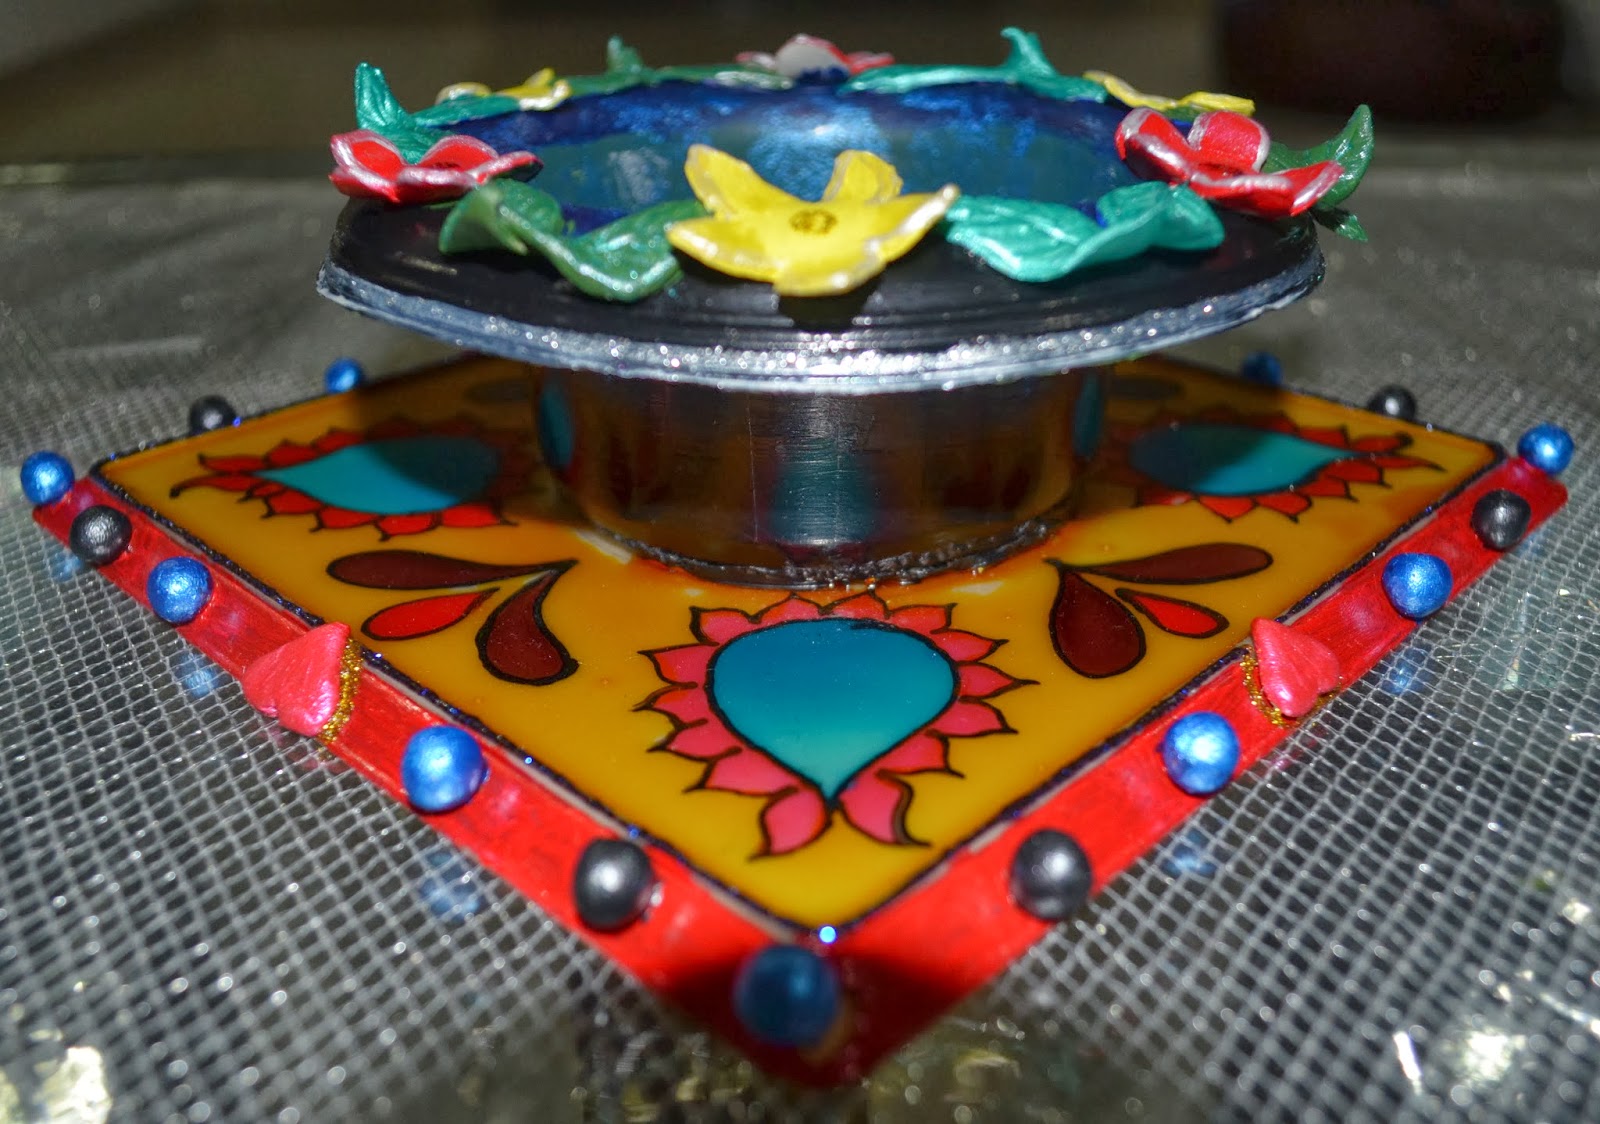
Step 4: Paint your frame with the colour you want on your frame. I painted my frame with yellow.


Step 5: Paint your text with some darker shade after your step 4 paint dries completely, Do this with the smallest size brush you have. If you are  not comfortable painting your text with brush, then use permanent markers like sharpie. but painting with brush gives better effect.


Step 6: Finally decorate and complete your frame giving it all extra personal effects, I have given a glitter layer once my paint has dried completely and finish it by applying 1-2 layers of gloss lustre mod podge to seal your work and give it an extra glossy effect.


We always have emotions but we lack in expressing it. So try making a personalised gift for people special in your life and make them feel special. We don't know how long life is, so don't be late to express your feelings.

Hope you liked it,
See you soon with another creative project, till then....
Love being creative.

Thanks for visiting.


Friday, 24 April 2015

Style your Laptop

Hey everyone,
In this busy and competitive life, We have all luxuries but the only thing most of us lack in is happiness. Happiness is something which could come in huge quantities from even the smallest thing and being happy and joyful will add magical sparkles in your life. I think we should keep at least one hour of everyday for ourselves, for our hobbies or for anything which makes you feel immensely joyful. Our life will get better and better everyday. 

I love doing my art and craft work, It's a kind of meditation for me. When i am with my crafty tools, I just escape to my imaginary world of joy.

Hence, I love being creative.

I love my laptop too... I spend a lot of my time on my laptop, so i decided to give my laptop a creative touch.

Things needed to do this project is: Your creativity, Sharpie permanent markers and your laptop afcourse ;)

I have used Sharpie Bronze metallic and Silver metallic as my main colour and for some detailing different coloured Sharpie permanent markers. If your laptop top is of some light colour unlike mine then you can play even better with different colours and flourish your creativity.

Below is the design of my style of laptop.


So i hope you liked this Style your laptop DIY
Enjoy styling your laptop
See you soon with another fun creative things.

Thanks for visiting,
Love being creative.


Thursday, 9 April 2015

Paper mache bowl

Hi all creative people,

Paper mache bowl


Many people are not new to paper mache art form. Paper mache is an ancient art form, which was used all over the world in different ways. In Kashmir,India paper mache has been used to manufacture small painted boxes, trays, cases, bangles etc. When i visited Kashmir some years ago, that was the time i got to know about this art form. The most important and interesting feature/characteristic about this art is, the object made with paper mache is extremely light weighted and easy to handle and also though it's very light but still it becomes very stiff and durable after drying completely. Its very easy to paint on a paper mache object. 

There are two main methods to do paper mache art, one makes use of paper strips glued together with adhesive, and the second one uses paper pulp obtained by soaking paper to which glue is added later.

The traditional method of making a paper mache adhesive is to use a mixture of water and all purpose flour or other starch, mixed to the consistency of heavy cream. 

Here in my paper mache project, I have used the first method, in this method a form for support is needed on which to glue the paper strips, I have used balloon as my base form for support in this project. paper is roughly cut or torn into pieces to make paper strips. Equal proportion of white glue(fevicol/Elmer's glue) and water is used to make adhesive. Paper strips are then glued with the brush on the form and allowed to dry completely. Several layers of paper strips are glued on form depending on how much thick you want your object to be.To do this paper mache project you really need to be patient and while you stick your paper strips to your form, make sure that no air bubbles remain. After the object dries completely, pinch the balloon and take it out. 

To give my bowl a finished look, I sticked newspaper rolled strip on top border of my bowl.(as shown in the below picture).


You can use acrylic colour to paint you paper mache object and then apply a layer of Gloss lustre mod podge to make your paint durable. So paint and decorate your object in your creative style. It can be used as a great home decor with a very minimal cost. 


I hope you liked it,
See you soon with another creative project,
Enjoy crafting.

Thanks for visiting.

Tuesday, 31 March 2015

DIY(best out of waste)Tooth brush holder

Hi all creative people... 

Creativity does not have any working hours for me, thoughts about creating something new keeps rolling in my mind. I feel very joyful While doing any creative project, It just combines my heart and mind at one place. I think everybody is born with some kind of creativity in them, the only difference is many people are not able to recognise it throughout there life. Our creations may not impress everyone, but the most important thing which creativity gives us is the 100 percent feeling of joy, feeling of being happy. So do not hide the child in us and let the creativity hidden in us flourish.

Here, I am sharing my cute Tooth brush holder i created using a waste water bottle and a Tropicana juice bottle cap. I am sharing my creation step by step to make it more clear and simple. It's so simple and cute.

Let's get started,

Step 1: Cut any drinking water bottle into half depending on what length you want for your holder using a cutter.


Step 2: Take any big and hard bottle cap which is approximately the size of your bottle base, I am using Tropicana juice bottle cap and stick the cap to the bottle using a hot glue gun. This makes the light weight bottle somewhat strong and it will not fell down when you will keep your brushes or anything you want to store in this bottle. (To make it more stronger, you can add marbles or pebbles after finishing the holder with all decoration.)


Step 3: To cover the top of my holder, I have used paper sticker as it also hide the sharpness of bottle. Cut the paper as per the size of bottle boundary and about one inch of width. Cut half inch of whole paper strip at around a centimetre difference.

Step 4: Stick the step 3 paper strip on top of holder as shown below.


Step 5: To make the holder and its bottle cap base look like a complete product and also to hide the uneven base of the bottle i rolled the twine at the bottom of the holder up to around half inch of length, stick the starting and end point of twine with hot glue gun. we cannot stick the whole twine with hot glue gun because the plastic gets melted and shape will be ruined.


Step 6: Now the fun part starts... To decorate and paint your holder as you like. As i am using it as my tooth brush holder, i painted small tooth and a quote 'Healthy smile, Princess Style'. You can decorate it depending on what you want to keep in it.


I hope you liked this,
Enjoy crafting and love being creative.

Thanks for visiting.

Tuesday, 24 March 2015

DIY Saree pin

Hi all there, This time i tried creating my style of saree pins. Saree pins are basically a supporting element for wearing saree. Saree (http://en.wikipedia.org/wiki/Sari) is a South Asian female garment. It is associated with grace and widely regarded as a symbol of Indian culture.

I have used Hobby ideas shilpkar (m-seal can also be used instead of shilpkar) as my base to stick on the plain saree pin. (Apply talcum or any face powder on your hands nicely so that shilpkar or m-seal will not stick to your hands)

Take any normal plain saree pin as shown in the above picture. Give any desired shape to your shilpkar and stick it to the pin using hobby ideas fabric glue. Shilpkar will take 25-30 minutes to dry completely so paint or stick stones or any other decorative material to your base before it gets dried, by doing this your items will get sticked to your base very firmly.
I have shared my three different designs of saree pin. but you can decorate it as you like.

Royal one.
 In this picture below, I have created a rectangular pattern of shilpkar to fit it exactly the shape of my pin, then i have created different sized flower petals from shilpkar and a circle as well to give my pin a 3D look.. ;) and finally painted and decorated it.
Bright one.

Elegant one.
So, i hope liked this DIY saree pins.
Thanks for visiting.

Tuesday, 17 March 2015

DIY Flower vase


 o


Hi all creative people,

Its been a long time, I have not shared my creations with you all.. sorry about that.. ;)
This time what i am sharing with you guys is really a very very simple project but still very cute and decorative. Waste thing i have used in this project is Starbucks Frappuccino empty bottle. I love Starbucks coffee and thus i get this bottles very frequently, so i got a thought lets recycle it in some cute and fast home decor.

Firstly what i did is to remove all unwanted stickers from the bottle using the hot water and the butter knife(wear gloves while doing this), actually first step is to drink this yummy cold coffee from the bottle.. ;) & when all stickers are removed let it dry before you start painting on it.. I have used acrylic colours and have done 3-4 layers of paint.. As you can see in the above picture i have used bright orange colour as my base paint and ya let the previous layer of paint dry completely before starting with next layer of paint, As you can see i have painted the top of the bottle with different colour but it's your wish you can paint with as many shades you want.

After i am done with all layers of base paint, i sticked different foam stickers(got stickers from dollar tree) making a pattern of a butterfly flying towards the flower, you can decorate it in any way you like... i did this coz i found this stickers very cute and a very fast way to decorate my bottle or vase.. Then i painted very lightly silver glue glitter with a paint brush and finally after it got dried completely i applied a layer of Gloss-lustre Mod Podge to make my all layers of paint, stickers and glitter bind perfectly with the bottle and also to get the glossy shine.

So this is how you can recycle any waste empty glass bottle or jar in your house.
Hope you like this cute vase.

Thanks for visiting.

Monday, 2 December 2013

HOME DECOR


Hey all Creative people... This time what i am sharing on my blog is a complete Best out of Waste creative creation.. I have used a waste plastic cake tray as my base & plastic bowl which comes with bouquet & sticked the bowl in the centre of the tray with the help of glue & hobby ideas shilpkar... i painted the tray with hobby ideas glass colour... flowers & leaves which i have sticked on the top of the bowl is also made from the same shilpkar..& also the balls on all the four sides of the tray is made from shilpar...& then i painted all the shipkar items with hobby ideas lilac & pearl acrylic colours... i have sticked my all shilpkar items to the tray & the bowl when they are semi dry so that they stick to it perfectly... likewise a beautiful HOME DECOR item is ready to decorate your home... i hope you liked it..

Thanks for visiting.